ANDROID Newsgroup Downloader Quick Start Guide
click here to visit the android
website
click here to go to the android user's manual
Welcome to the ANDROID Newsgroup Downloader Quick Start Guide. This guide
will get you up and running quickly so that you can start downloading files from
newsgroups.
Table of Contents
Phase 1:
Downloading and Installing the Program
Phase 2: Configuration
Phase 3: Select your
Newsgroups
Phase 4: Connecting
for the first time
Phase 5: Selecting
and Downloading Headers
Phase 1:
Downloading and Installing the Program
Note: If you're downloaded this guide, then you may have
already downloaded and installed the software. If so, you can skip this phase
and proceed to configuring the program.
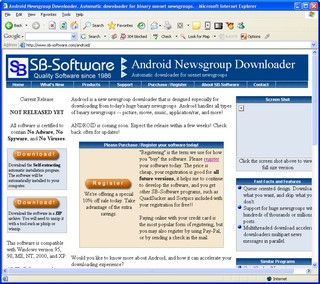
The first step is to download the software. This is done from
the ANDROID website at:
http://www.sb-software.com/android/
| Here's a picture of the ANDROID website. It might look a little bit
different, depending on whether or not I've made any improvements
lately, but it should still be intuitive and easy to figure out.
The big orange <Download> button is used to download the software
from the website to your computer.
So, to get things started, click the download button. |
 |
Once you've clicked the download button, your web browser will download the
software to your computer. If you're running Internet Explorer on Windows XP,
then you'll probably get a box that asks whether you want to "Run", "Save", or
"Cancel".
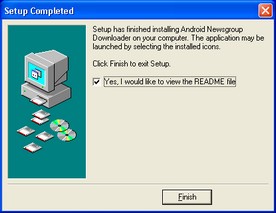
Click the button marked "Run", and that will download the
installation program and then run it automatically for you. Now let's go
through the steps involved in the Android installation program:
Phase 2: Configuration
The next phase of the Android QuickStart is to activate the program for the
first time and enter the appropriate configuration options to get Android
setup and connected to your news server.
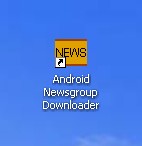
| The installation program automatically places an icon for Android
Newsgroup Downloader on your desktop. Click the icon to open the program
for the first time. |
 |
| |
|
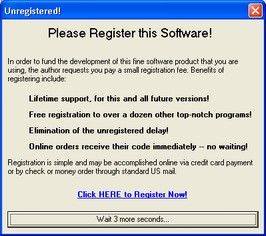
| The first thing that you will see after launching the program is the
"please register" screen. This screen is an incentive for you to
register the software, and will nag you each time you load the program
until you do so.
Registering your software is important as it provides me, the author,
with the funds that I need to continue developing the software.
Wait for the delay to expire, and then you can hit to <Ok>
button to proceed into the software. |
 |
| |
|
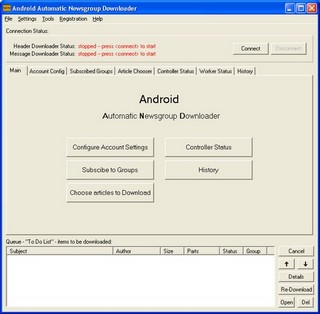
| Here is the main window of Android Newsgroup Downloader. You can see
several important parts of the interface.
The section in the middle of the screen is a "tabbed view". It
contains several pages that you can flip through by pushing the little
tabs above it. The page that is currently displayed is the main page,
and includes several large buttons for commonly used options.
The first thing that we're going to need to do is to configure your
account settings. To do this, click the <Configure Account Settings>
button. |
 |
| |
|
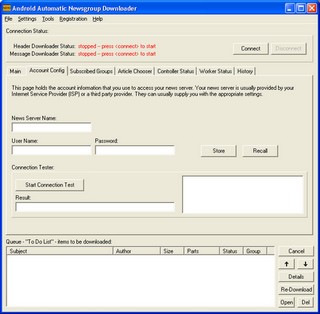
This is the account settings screen for the downloader. As you can
see, all of the important settings are blank, and waiting for you to
fill them in. The account settings are critical for you to get correct,
and the program will not function without the correct settings. The
settings are:
News Server Name: The name of the computer that your
computer will connect to to receive news articles from. This computer
is typically provided by your ISP, and usually starts with something
like "nntp." or "news.". Common news server names include
news.giganews.com, news.earthlink.net, etc.
User Name: This is your user name, as used on the news
server. This user name is provided by whomever setup your account on
the news server. Many times, this user name is supplied by your
internet service provider.
Password: The password goes along with the user name.
Normally, you will get these settings from your internet service
provider. If you do not know the settings, then you can contact them.
Just tell them you want to "setup a third party newsreader" |
 |
| |
|
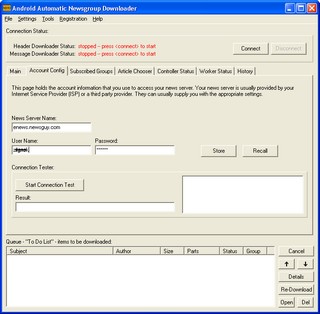
| In the picture to the right, I've entered my configuration details
into all three boxes -- news server name, user name,
and password.
If you want, you can use the <Store> button to store a copy of
the settings for later use. The <store> and <recall>
buttons are primarily intended for using multiple news servers or
multiple accounts. You can store several sets of settings, and pick
between them at a later date. For now, you can safely ignore the store
and recall buttons.
The next step is to run a connection test. Press the <Start
Connection Test> button. |
 |
| |
|
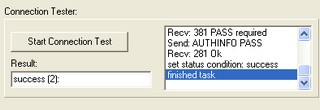
| The connection test button will simulate a connection to your news
server and verify that your settings are correct. It'll usually take a
minute or two to run.
If all goes as planned, you'll get a "Success" code in the result
window, and the status text in the listbox will also indicate successful
completion. If not, the status window should show what type of error
occurred. |
 |
Getting the account settings (news server name, user name, and password)
correct is the most difficult step in getting any newsreader to work. If
you've got this far, and the connection test was successful, then
congratulations, you've successfully configured Android Newsgroup Downloader.
If not, then the first step is to double-check the account settings.
Phase 3: Select your Newsgroups
The next task is to select the newsgroups that you want to download. There
are tens of thousands of groups, and you'll need to pick the ones that you are
interested in. The first step is to get to the "Subscribed Groups" page in the
main window. The easiest way to do this is to use the little tab buttons in
the page control:

Click the tab button that says "Subscribed Groups". That will take
you to the subscribed groups page.
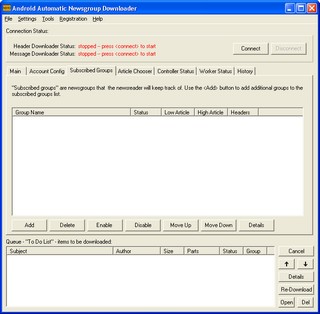
| Here is the Subscribed Groups page of the interface. You can see
that the list of groups is initially empty, because you have not added
any groups. Right under the empty group list is a row of buttons.
Click the <Add> button to add your first group. |
 |
| |
|
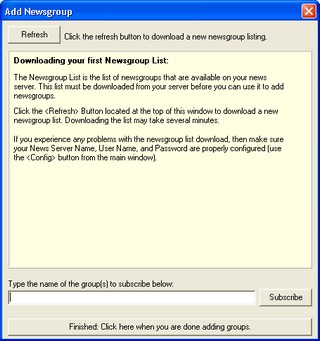
When you pressed the <Add> button, the Add Newsgroup dialog should
have popped up. This is the dialog box that you will use to add groups
to your subscribed list. There are two ways to do this:
- If you already know the group that you want (like
alt.binaries.pictures.celebrities for example), then you may simply
type in the name of the group and hit the <Subscribe> button.
- ... However, that's not very convenient if you do not know the
name of the group, or you do not know how to spell it. In this case,
you want to download a list of available groups that you can browse.
To download the available list of groups, use the <Refresh>
button at the top of the screen. |
 |
| |
|
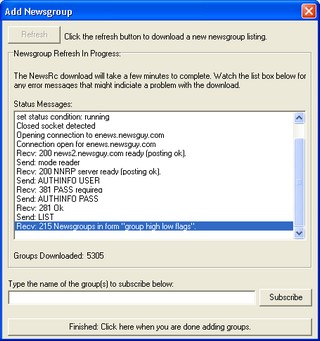
| When you press the <Refresh> button, the program will attempt to
download a newsgroup list, or "newsrc". The downloading process will
take some time, and you should see some messages like those appearing to
the right.
In particular, watch for any error messages such as incorrect names
or passwords (this would indicate a problem with the account settings).
Once the newsrc has been downloaded, the display will be updated to
show the list of available groups. |
 |
| |
|
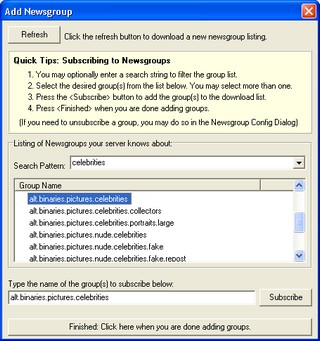
| Pictured to the right is the add newsgroup dialog box after the
newsrc has been loaded. If you're looking to download binary
attachments, then you want newsgroups that start with the words "alt.binaries".
If the newsgroups do not start with "alt.binaries", then they will not
contain files, and there will be nothing to download.
You can scroll the list to find the group you want, or you can use a
search specifier.
For example, in the list to the right, I used a search specifier of
"celebrities". This brought up several groups, including
alt.binaries.pictures.celebrities.
Click the group that you want, in my case "alt.binaries.celebrities",
and then hit the <Subscribe> button. Using the subscribe button
will add the newsgroup to the list of subscribed groups.
When you are finished adding groups, click the <Finished>
button |
 |
| |
|
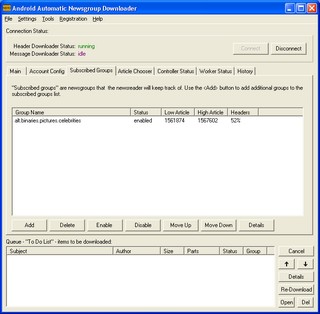
| Once you've added your groups, they should appear in the "subscribed
groups" list of the main window.
In the picture to the right, the "alt.binaries.pictures.celebrities"
group is listed in the window. The group's status is enabled. The high
article, low article, and headers fields are empty because we have not
yet downloaded any headers. |
 |
Phase 4: Connecting for
the first time
| At this point, you should have configured your account settings and
selected one or more newsgroups to download.
We are now ready to connect for the first time, and download the
"headers" of the newsgroup articles.
To do this, press the <Connect> button at the top of the main
window.
in the screenshot to the right, I've pressed the connect button. The
header download status went from "stopped" to "running". In addition,
you should see the header count for your groups increasing.
Eventually the header thread will go to an "idle" state. This
indicates that all headers have been downloaded. |
 |
Phase 5: Select some
headers and download
At this point, you should have done all of the following:
- Configured your account settings and verified that they were
correct.
- Selected the newsgroups that you wanted to download
- Pressed the connect button to connect to your news server and
download the headers for your groups.
If you have not done those steps, then please go back and do them
now. |
|
| |
|
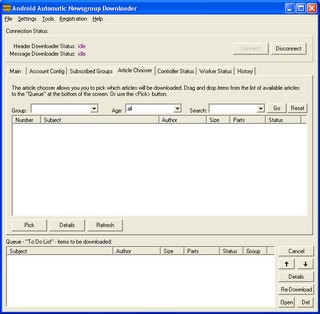
| To choose the headers you want to download, we need to use the "Article
Chooser".
To get there, find the little tab that says "Article Chooser"
and click it. The chooser will initially be empty, and will look like
the dialog box at the right. |
 |
| |
|
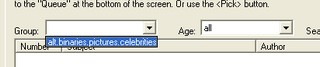
| First, we need to select the group that you want to view. The
chooser has a little drop down list at the upper left portion of the
display. Click the list button, and you should see a mini-list of your
newsgroups. Pick the group that you are interested in. |
 |
| |
|
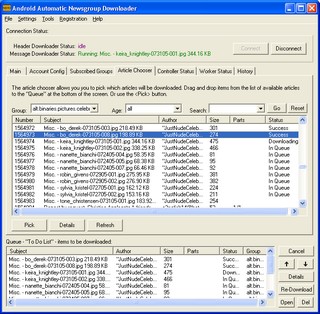
When you select the group, the chooser will update to display the
headers in that group. If the headers do not display, then there might
be a problem:
- the group could be empty
- ... or you didn't press the <connect> button
- ... or you pressed the <connect> button, but the headers for this
group have not been downloaded yet.
The chooser is very flexible. You can scroll up and down. You can
enter a search specification, and you can filter by numerous methods,
including by age. You can also sort the display by clicking the headings
of the list view.
The chooser to the right is of the alt.binaries.pictures.celebrities
newsgroup. The display shows articles containing pictures of bo derek,
kiera knightly, nanette bianchi, robin givens, and sylvia kristel. |
 |
| |
|
| To select articles to be downloaded, click on them and drag them
from the chooser list to the "queue" list at the bottom of the main
window.
Assuming you are "connected" to the news server, downloading should
begin immediately after you've dragged the images from the chooser to
the queue.
|
 |
| |
|
| Once the articles have been downloaded, the status for the article
will change to "Success". In the screen shot to the right, you can see
that several pictures of gillian anderson have been successfully
downloaded. |
 |
| |
|
| You can use the <Open> button in the queue to open an article
that has been successfully downloaded. Note that articles that haven't
been downloaded yet cannot be viewed, and articles which resulted in
errors also cannot be viewed.
The shot to the right shows one of the gillian images that was
downloaded from the alt.binaries.pictures.celebrities newsgroup.
Windows automatically launches the most appropriate viewer for the
type of file you've downloaded. Pictures will get a picture viewer,
movies and music should also get the appropriate viewers. |
 |
This concludes the quickstart tutorial. I've showed you how to download and
install the software, configure the authentication settings, choose your
newsgroups, connect to your server, select some pictures, and even download and
view one of the pictures.